Composting for the Home Gardener
We have all heard of this magical stuff called compost. But what is it? Where does it come from? Why is it so important for our gardens? The reason compost is so important is because it enriches our soil, adding important nutrients that are used by plants for growth. When we create compost, we are breaking down organic matter into a form that provides a rich amendment for the soil and promotes healthy microbial activity. With these nutrients, plants can better resist disease and insects. In addition, compost increases water retention and helps reduce soil diseases. And it can be rewarding to make your own!
What do you need for great compost?
Green material—Yard waste, kitchen vegetable scraps, coffee grounds, or fresh grass clippings. This fresh waste provides the compost's nitrogen content. Do not add meat, dairy products, oil, fat, or dog or cat manure.
Brown material—Dried leaves, torn up newspaper, pieces of cardboard boxes, or shredded paper bags. This dry material provides the carbon content. The smaller you cut the pieces, the faster the composting process will be.
How much of each—Start with equal parts of green and brown material and add up to twice as much brown material as green. Don't use more green material than brown.
Water—Water each layer of the pile to the level of a wrung out wet sponge. If the bin is exposed to rain and gets too much water, you might need to cover it.
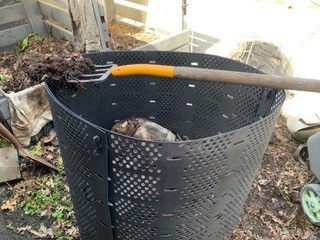
Air—Turn the pile every few days, if possible, but at least once a week for air circulation. A pitchfork works well for turning. In addition to letting the pile “breathe”, it helps prevent problems with flies and rodents. Turning the pile helps maintain an optimal temperature, while mixing prevents dense clumping of some materials such as wet green grass.
Temperature—Heat in the pile is generated by bacteria feeding on the green material. Temperatures above 140°F will kill many pathogens and weed seeds and will also accelerate decomposition for faster composting (see below). A compost thermometer with a long probe gives good information about when to turn the pile and when to water it.
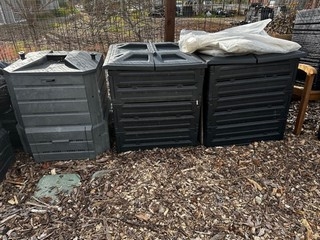
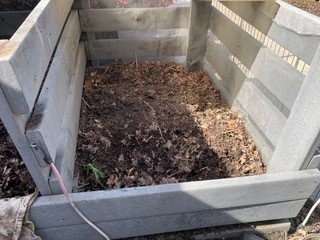
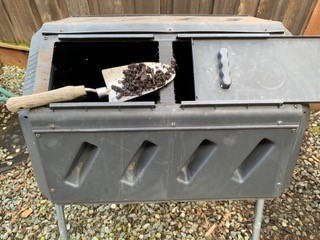
Different methods of composting—Factors to consider when choosing a method include the time and energy needed to maintain the pile, the amount of compost needed, and the time needed to achieve the finished product. The pile needs to be at least 3 feet square to generate enough heat for decomposition. You can build the compost pile right on the ground but if you build a structure to contain the pile, it should be 3–5 feet with one side open for easy access to build or turn the pile. Sun or shade does not matter as the temperature of the pile depends on its composition, not exposure to the sun. Other composting containers can include a closed container, like a rolling barrel, or an open bin composter. There are many ways to make compost: underground, above ground, in bins, in boxes, in pits, in bags, in barrels, in strips, in sheets, and in trenches.
Slow composting method (easy but slow)—Continuously add materials to the pile with little or no chopping of materials. Bury ‘green' scraps 6–12 inches in the center of your bin to reduce attracting flies and rodents. Turn and water as desired for finished compost in 12 to 18 months.
Intermediate composting method (a little more work but faster)—Build a 3' x 3' x 3' pile with materials cut into 2-inch pieces. Turn and water the pile weekly without adding more material to get finished compost in 3 to 8 months.
Fast composting method (the most work but finished fastest)—Build a 3' x 3' x 3' pile with materials chopped to ½ to 1½ inch pieces. Check the temperature of the pile every day with a thermometer in the center of the pile. Turn the pile immediately if the temperature is 150 degrees F or above. Turn and water daily while the pile is between 140–150 degrees F. As the pile cools, turn it whenever it reaches 120 degrees F. Once the pile cools below 120 degrees F, turn and water every week for finished compost in 6–8 weeks.
When is the compost done? The pile will shrink, losing about 1/3 of its volume. It will be dark brown and crumbly with an earthy smell. You should no longer be able to tell what each of the individual ingredients was. Allow compost to age for two weeks before you add it to the soil around plants. Or incorporate it into the soil, but don't sow seeds or transplant seedlings for two weeks.
For more details about composting and what materials to use:
https://sacmg.ucanr.edu/files/163139.pdf
For information about how to use compost in the home garden:
https://ucanr.edu/sites/ccmg/files/221120.pdf
This video is from our own composting experts at our demonstration garden in Walnut Creek: https://www.youtube.com/watch?v=E77Yps9K2bw The garden is open to the public on Wednesday mornings April through October. Please stop by and ask questions.
We hope to see you at Our Garden!
Help Desk of the UC Master Gardeners of Contra Costa County (JRB)


